Saturday 19 July 2008

Making Selections with Paths

If you are given a horrible photo and need to remove background clutter then Photoshop has plenty of tools to help you do this but the best and most controllable is to make selections using the pen tool.
Here is a typical candidate for treatment:


The above is a classic example of the sort of image that needs help, could be a snap for uploading to ebay, and doesn't show the product in a good light- help is needed to make it look less like an amateur snap.
Firstly select the pen tool from the tools pallet:
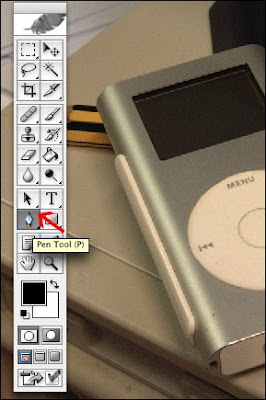

Then move in close with the magnifier tool and click roughly round the edges that you wish to select.


A a series of nodes will be left at each point you click and when you have gone round the object you need to join up to the starting node, you'll see a small 'o' to confirm that the path has been joined.
We should now have a rough path that we'll need to refine by attaching anchor points to move the path to its final postion, here is how you select the anchor point tool under the pen tool
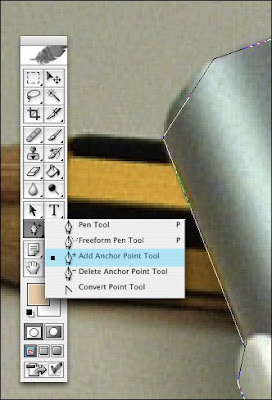


By placing the anchor points on the roughly selected outline we can just drag them into their final position and if necessary you can use the 'handles' to ensure the selection curve matches:
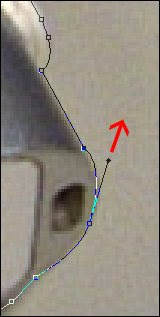

These are often referred to as Bezier curves, and make very accurate selection fast even with a mouse.
After you path has been tidied up you'll need to load it into a selection:
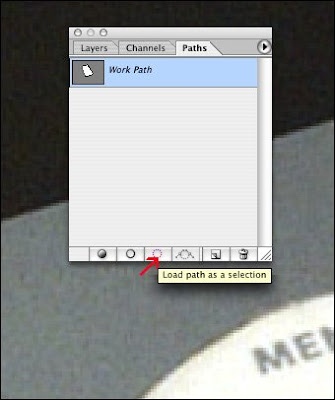

This is done by clicking the load selection button in the middle of the paths pallet.
We should now have a accurately selected subject, almost ready for cutting out and putting on our web white background, just feather the selection by 1 pixel:


Then click on the background in the tools pallet to select the background colour.
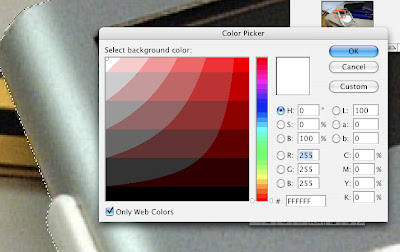

Now go to the top menu and select inverse (if you don't your subject will white out)!
Next just press the back space button to give your subject a nice clean background.


Next just do the normal cropping and tidy up, final sharpen and you have a picture ready for upload to Ebay

Friday 18 July 2008

Sharpening Images

Most digital images need some sort of sharpening, whether they come from a top line DSLR or Scanner. Some folks use in camera sharpening, Raw Software or sharpen in their scanner software, others use the Photoshop 'unsharp mask' with various favourite settings depending on file size or image type.
The biggest disadvantage of those methods is that some types of image i.e portraits need sharpening to be applied only to certain areas, eyes or hair- but certainly not skin or other picture elements that may cause artifacts to appear.
The following method is sometimes referred to as 'High Pass' sharpening and can be used to target areas that we wish to sharpen.
Here is my tutorial.

Firstly make a duplicate layer by going to the layers pallet and dragging the background layer onto the create new layer icon:


This will create a layer called 'backgound copy' after which we change the mode from normal to overlay
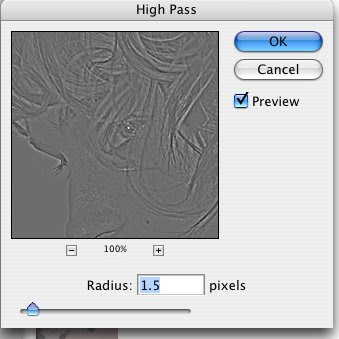
The next step is to apply the High Pass filter, by going to the top menu-bar and selecting Filter > Other > High Pass.
This brings up the following Dialogue box.


In this box we need to set the Radius I normally use a Radius of 1-3 where the larger number will give the strongest sharpening. In this tutorial I selected 1.5.

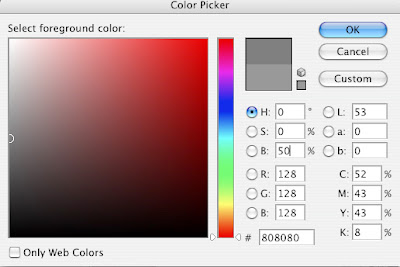
Now we need to bring up the colour picker tool which can be done by left clicking the foreground colour in the tools pallet
to bring up this box:


Now enter 50% in the Brightness box of the HSB boxes to give a mid-grey.


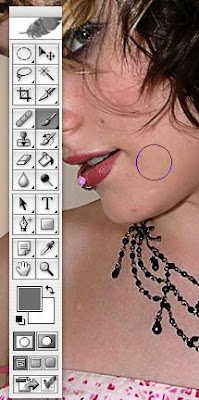
Now were ready to work on our image. We now select the brush tool and use it to paint the High Pass layer to remove unwanted sharpening on skin or smooth toned objects that may show noise or artifacts.

If you find that you have slightly over sharpened your image you can go to the layers pallet and lower the opacity to reduce the overall effect, and because we are doing this on a layer it is non destructive.


There are some caveats with using this method, Firstly if your image has lots of artifacts because it is a heavily compressed jpg or if there is color fringing this method may cause some issues. In this case you can set the high pass layer to 'soft light'.
The method is very useful though and is certainly better than the standard unsharp-mask method.